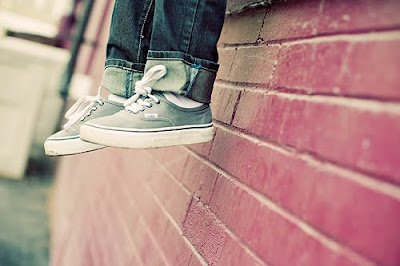
Salam to all readers.
Lagi- lagi tutorial pasal vintage.
Mesti korang bosan kan.. -.-"
Tajuk tutorial untuk entry kali ini adalah
Vintage | How to Create Dreamy Vintage
Oh ya, tutorial kali ini ada menggunakan 3 texture..
texture tu korang boleh download je..
Okey.
macam biasa,
tutorial in English.
Selamat Mencuba.
BEFORE

credit to: http://maggieholmes.typepad.com
AFTER

STEP 1
Open your picture in Adobe Photoshop

STEP 2
Insert Color Balance
Image > Adjustments > Color Balance
Midtones = +14, +26, +41
Shadows = -11, -20, +10
Highlights = +15, +26, +45

STEP 3
Insert selective Color
Image > Adjustments >selective Color
Red = +17, +16, -17, +2
Yellow = -19, -24, +13, -14
Neutral = +16, -8, -16, +19

STEP 4
Create a new layer and
fill the layer with the color: #14317A (Alt+Backspace)
Change blend mode to Exclusion, opacity: 50%


STEP 5
Insert Gradient Map
Image > Adjustments >Gradient Map
Change blend mode to Screen, opacity: 40%


STEP 6
Adjust Brightness/Contrast
Image > Adjustments > Brightness/Contrast


STEP 7
Take this texture and place it on top of your picture
Blend mode: Lighten, opacity: 100%


STEP 8
Continue to put this texture
Change blend mode to Screen, opacity: 100%


STEP 9
Now, take the other texture
Blend mode: Screen, opacity: 100%


STEP 10
Select background layer
Insert Lens Correction
Filter>Distort>Lens Correction
Vignette
Amount= -50
Midpoint = +50


DONE.
nota kaki:
Tutorial kali ini macam panjang sikit.. -.-"
Banyak step.
Tapi still simple kan.
Ermm korang, tutorial cik Dil susah nak faham ke??


bagi orang yang tak reti-reti macam aku memang rumit sangat lar..haha
ReplyDeletethanks,sekurang2nya leh ikut step by step..slowly pon takper...
@ ghost writer: 2 laa..trase pnjang sgt tutorial ini..fenet dil buat..heheehe..okey..
ReplyDeletecantek! ;)
ReplyDeletesuperb! boleh try nanti mlm ni
ReplyDeletehye...nice entry..sgt bgus 4 th0se wh0 r learning just like me...keep it up 0key!thnak 4 share...sharing is caring!=)
ReplyDeleteada tak cara yg simple sikit . tak boleh buatlah. macam mane nak fill the layer tu yg masukkan color wane biru tu?*step 4
ReplyDeletehehehe..apik x hebat langsung dalam potoshop
ReplyDelete@ adah: ni dah abis smple dah nii..oh ye, nak masukkan background cume tukar color yg nak tu kat foreground..lps tuu tkat Alt+backspace..senang jee
ReplyDeletecik dil...ngee...edit gambar saya nak??....nak wat seniri x reti laa guna potoshop....tolong wat kan leh? hehe...
ReplyDeleteakk mcm mne nk cri lens correction tkdk pon ? sye gne cs5 ?
ReplyDeleteSuka2.. :-)
ReplyDeletetq ya
hahaha...
ReplyDeletekonsep die lbh kurg mcm sy nyer lomo splash...
ni link nk ke c2..
http://kijerans.blogspot.com/2011/02/tutorial-lomo-splash.html
yg penting mcm mane kite nk blend texture 2 n main dgn colour die...
btol tak??
cik dil ... sj nk minta kbenaran nak simpn tips ni sbg nota peribadi je .. so kalo nk buat bleh rujuk blek ... sj x akn publish kt ane2... bleh x? anyway tips photoshop ni sgt best ... hehehehe ^^
ReplyDeleteaduhh peningnya pala, and lastly tak jadi ;(
ReplyDeletecik dil, step 7 and setrusnye cm ne nk wat..cm ne nk amik texture tu..
ReplyDelete